As an Amazon Associate, I earn from qualifying purchases
Credit: thedaringkitchen.com
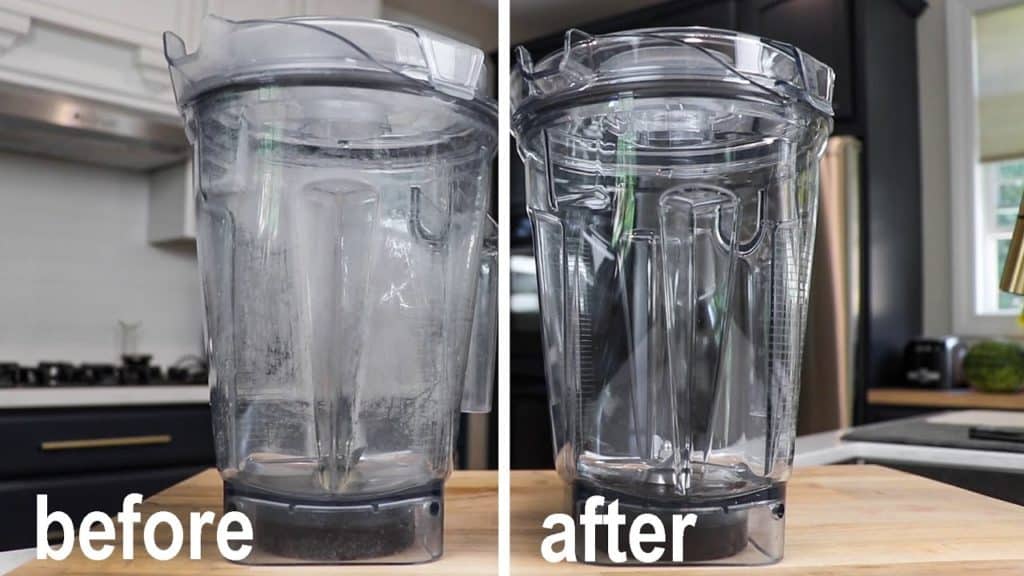
Ninja blenders are popular for making smoothies and soups. Keeping your Ninja blender clean is important. A clean blender works better and lasts longer. Here, we will explore how to clean a Ninja blender step by step.
Why Cleaning Your Blender is Important
Cleaning your blender regularly has many benefits:
- Hygiene: Cleaning removes germs and bacteria.
- Flavor: Old food can affect the taste of new recipes.
- Performance: A clean blender works more efficiently.
- Longevity: Regular cleaning helps your blender last longer.
What You Need to Clean Your Ninja Blender
Gather the following items before you start cleaning:
- A soft sponge or cloth
- Dish soap
- Warm water
- A brush for hard-to-reach areas (optional)
- A towel or drying rack
Step-by-Step Guide to Clean Your Ninja Blender
Step 1: Unplug The Blender
Before you start, always unplug the blender. This keeps you safe while cleaning.
Step 2: Disassemble The Blender
Next, take apart the blender. Remove the pitcher, blade assembly, and lid. Be careful with the blades. They are sharp!
Step 3: Rinse The Parts
Rinse all the parts under warm water. This helps remove food bits and stains. Make sure to rinse the lid and pitcher well.
Step 4: Wash With Soap
Apply a few drops of dish soap to the sponge. Clean the pitcher, lid, and blade assembly. Use a brush for hard-to-reach areas if needed.
Step 5: Clean The Base
Wipe the base of the blender with a damp cloth. Do not immerse the base in water. Keep it dry to avoid electrical issues.
Step 6: Rinse Again
Rinse all the washed parts under warm water again. Make sure all soap is gone. Leftover soap can affect the taste of your food.
Step 7: Dry The Parts
Dry all the parts with a towel. You can also let them air dry on a rack. Make sure everything is completely dry before reassembling.
Step 8: Reassemble The Blender
Once everything is dry, put the blender back together. Place the blade assembly back in the pitcher. Then, attach the lid securely.
Cleaning Tips for Ninja Blenders
Here are some tips to keep in mind:
- Clean your blender right after use. This makes it easier.
- Avoid using abrasive cleaners. They can scratch the surface.
- Do not put the base in water. It can cause damage.
- For tough stains, soak the parts in warm soapy water.
Using the Self-Cleaning Method
Ninja blenders have a self-cleaning feature. This makes cleaning even easier. Here’s how to use it:
- Fill the pitcher halfway with warm water.
- Add a drop of dish soap.
- Secure the lid and blend on high for 30 seconds.
- Rinse the pitcher and lid with warm water.
Common Mistakes to Avoid
Avoid these mistakes when cleaning your Ninja blender:
- Do not put the base in the dishwasher.
- Do not use metal utensils to scrub. They can scratch.
- Do not forget to unplug before cleaning.
Maintaining Your Ninja Blender
Regular maintenance keeps your blender in top shape:
- Check the blades for wear. Replace if needed.
- Inspect the seals for damage. Replace if necessary.
- Store your blender in a dry place.
Conclusion
Cleaning your Ninja blender is easy. By following these steps, you can ensure it stays in good condition. A clean blender means better smoothies and soups. Remember to clean it after every use. Your taste buds will thank you!
Frequently Asked Questions
How Do I Clean My Ninja Blender?
Start by disassembling the blender. Rinse the parts under warm water and use mild soap to clean.
Can I Put My Ninja Blender Parts In The Dishwasher?
Yes, most Ninja Blender parts are dishwasher safe. Check the user manual for specific guidelines.
What’s The Best Way To Remove Tough Stains?
Soak the parts in a mixture of warm water and vinegar for 15 minutes, then scrub gently.
How Often Should I Clean My Ninja Blender?
Clean your Ninja Blender after each use to maintain performance and hygiene.
As an Amazon Associate, I earn from qualifying purchases
Pingback: How Long to Cook Whole Chicken in Ninja Woodfire Grill