As an Amazon Associate, I earn from qualifying purchases

Choosing between a bread machine and a stand mixer can be a pivotal decision when enhancing your baking prowess. In this article, we delve into the nuances of these kitchen appliances to help you make an informed choice that aligns with your baking needs.
From convenience and versatility to quality and efficiency, explore the key factors influencing the debate between bread machines and stand mixers in homemade bread and beyond.
Understanding the Bread Machine
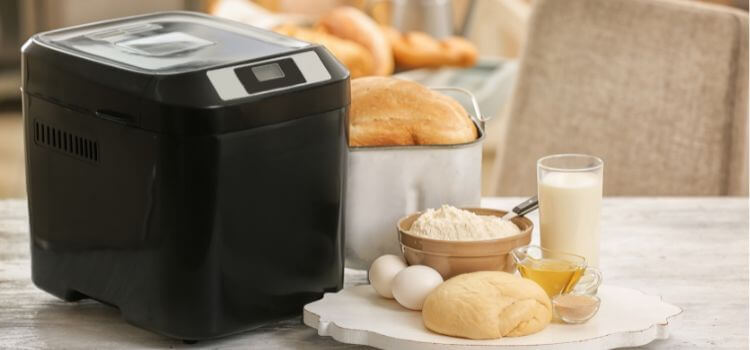
A bread machine, a bread maker, is an electric kitchen appliance designed specifically for making homemade bread. It consists of a baking pan with built-in paddles, a control panel, and a heating element that allows the dough to rise and bake in one compact unit.
How To Use Bread Machine
If you’ve recently purchased a bread machine or are considering getting one, you may wonder how to use it. While the process may seem intimidating initially, using a bread machine is quite simple and can produce delicious homemade bread with minimal effort.
Step 1: Prepare the Ingredients
The first step in using a bread machine is to gather and measure all the ingredients for your recipe. Ensure you have everything on hand and measure accurately.
Follow the recipe closely, as different breads need different measurements or ingredients. For example, whole wheat bread may need more water than white bread.
Step 2: Add Ingredients to the Bread Pan
Once your ingredients are measured and ready, add them to the bread pan in the correct order. Adding ingredients in the wrong order can affect the outcome. Generally, add wet ingredients (water or milk) first, followed by dry ingredients (flour, yeast, salt, sugar).
Step 3: Select the Correct Settings
Next, select the appropriate settings on your bread machine. Most machines have options for different types of bread like basic white, whole wheat, or gluten-free. Choose the desired loaf size and crust darkness. If your machine has a timer, set it to get your bread ready at a specific time.
Step 4: Start the Machine
Once all the ingredients are in the bread pan and the settings are selected, start the machine. The process may vary by model, so check your manual if needed. After starting, the machine will knead and bake the bread per the settings. Some machines allow you to add ingredients like nuts or dried fruit during baking.
Step 5: Remove the Bread and Enjoy
After baking the bread, your machine will likely beep to signal it’s done. Carefully remove the hot bread pan using oven mitts or potholders. Allow the bread to cool briefly before removing it from the pan and placing it on a wire rack to cool completely. Once cooled, slice and enjoy your freshly baked bread.
Pros and cons of a bread machine
Pros:
- Convenience: The bread machine automates the entire bread-making process, from kneading and rising to baking. This means minimal effort is required on the baker’s part, making it a popular choice for busy individuals or those new to baking.
- Versatility: Bread machines offer a variety of settings and options for different types of bread, such as white, whole wheat, and gluten-free. They also often include additional features like jam-making or dough-only modes.
- Consistency: With precise measurements and automated processes, bread machines produce consistent results every time, eliminating the risk of human error in traditional baking methods.
Cons:
- Limited capacity: Most bread machines have a maximum loaf size of 2 pounds, which may not be enough for larger families or occasions.
- Limited control: Bread machines often have limited customization options, such as adjusting kneading time or adding mix-ins, which may not suit experienced bakers who prefer more control over the bread-making process.
- Additional cost: Investing in a bread machine can be costly, especially if you own a stand mixer. It may also require additional purchases such as bread machine flour or yeast.
Understanding the Stand Mixer
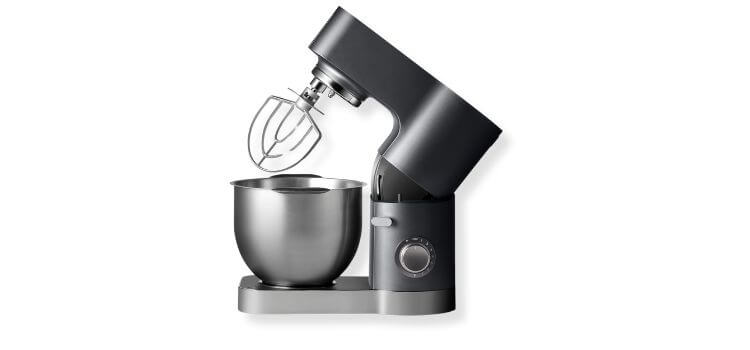
It is a countertop appliance designed for efficient mixing, beating, and kneading ingredients in baking. It consists of a base unit with a motor and various attachments, such as dough hooks, wire whips, and flat beaters.
How To Use Stand Mixer
The process is also relatively simple if you prefer using a stand mixer to make bread dough. Here’s how to use a stand mixer for bread dough:
Step 1: Gather the Ingredients and Attachments
Before starting, ensure you have all the ingredients and attachments needed for your recipe. You will need a dough hook attachment specifically designed for kneading bread dough.
Step 2: Add Ingredients to the Mixer
Add all ingredients (wet first, followed by dry) into the bowl of your stand mixer. The order may vary slightly depending on your specific recipe.
Step 3: Set the Speed and Knead
Set your stand mixer to a low speed and Use the dough hook attachment to knead the dough. Gradually increase the speed as needed until the dough is smooth and elastic.
Step 4: Allow the Dough to Rise
Once the dough is kneaded, transfer the dough from the mixing bowl to a greased bowl. Cover it with plastic wrap or a damp towel and allow it to rise until it has doubled in size.
Step 5: Shape and Bake the Bread
After the dough has risen, punch it down and shape it into your desired loaf shape. Place the dough in a greased bread pan and let it rise once more until it reaches the rim of the pan. Preheat your oven to the recommended temperature, then bake the bread for the specified time.
Step 6: Cool and Enjoy
After baking, take the bread out of the pan and let it cool on a wire rack before slicing and enjoy your homemade bread.
Pros and cons of a stand mixer
Pros:
- Versatility: Stand mixers are versatile kitchen appliances that can be used not just for bread but also for a wide range of other baking tasks, such as making cakes, cookies, and pastries.
- Capacity: Most stand mixers have a larger capacity than bread machines, with some models capable of accommodating up to 8 pounds of dough.
- Customization: With multiple attachments and speed settings, stand mixers offer a high level of customization and control over the baking process, allowing for more experimentation and creativity.
Cons:
- Time-consuming: Unlike bread machines, which automate the entire process, using a stand mixer requires more time and effort as the baker needs to manually monitor and adjust the dough’s progress.
- Learning curve: Stand mixers can be intimidating for beginners and may require practice to master their functions and attachments effectively.
- Cost: Stand mixers tend to be more expensive than bread machines, with additional costs for accessories and attachments that may not be included in the initial purchase.
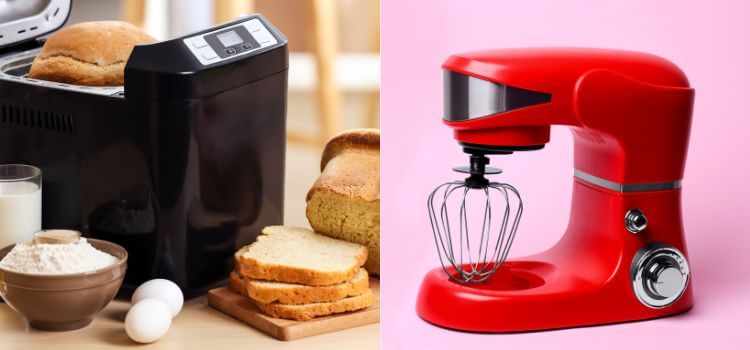
Factors to Consider: Bread Machine vs Stand Mixer
- Cost comparison: Regarding cost, bread machines tend to be more affordable than stand mixers. A basic bread machine can range from $50-$100, while a decent stand mixer can start at $150 and go up to $500 or more for high-end models. However, if you already own a stand mixer for other baking tasks, investing in a separate bread machine may not be worth the additional cost.
- Time-saving benefits: Bread machines save time in terms of convenience and automation, while stand mixers require more manual effort and monitoring. However, some bakers argue that the extra time and effort put into using a stand mixer can yield better results and provide satisfaction.
- Quality of bread: While bread machines offer consistent results, stand mixers can produce a wider variety of textures and flavors through manual tweaking of ingredients and techniques. This can result in a higher quality loaf for experienced bakers willing to put in the extra effort.
Making the Decision
Tips for choosing the right appliance based on individual baking preferences:
- Convenience: If convenience is a top priority, a bread machine may be better. Its automated process allows for minimal effort and time commitment.
- Versatility: For those who want to experiment with different types of baking, a stand mixer provides more versatility with its various attachments and settings.
- Budget: Consider the initial cost as well as potential long-term costs. A bread machine may be more cost-effective if you’re on a tight budget.
- Space availability: Bread machines are usually compact, making them easy to fit on countertops or store in cabinets, while stand mixers tend to be bulkier and require dedicated storage space.
Recommendations for beginners and experienced bakers:
- Beginners: For those new to baking, a bread machine may be the best option as it is user-friendly and requires minimal effort. As skills and confidence grow, investing in a stand mixer can open up more possibilities for experimentation.
- Experienced bakers: Experienced bakers may prefer the versatility and control of a stand mixer, but having both appliances can provide the best of both worlds – convenience and customization.
Conclusion
Choosing between a bread machine and a stand mixer depends on individual preferences and needs. Both have advantages and disadvantages, so it’s important to consider factors such as cost, time commitment, quality of bread, and personal baking style before deciding.
However, having either or both appliances can greatly enhance the baking experience and produce delicious homemade bread. Happy baking!
As an Amazon Associate, I earn from qualifying purchases