As an Amazon Associate, I earn from qualifying purchases

Pressure cookers have transformed home cooking — modern-day whiz-kids doing the canning in the kitchen without the loss of flavor, texture, or nutrition. There are so many options out there but what we found genius was the NuWave Pressure Cooker it gets the job done with a super easy to use design, plus it can do everything from slow to pressuring cooking! With this guide, you will learn everything you need to know about maximizing your nuwave pressure cooker and be glad to create wonderful meals!
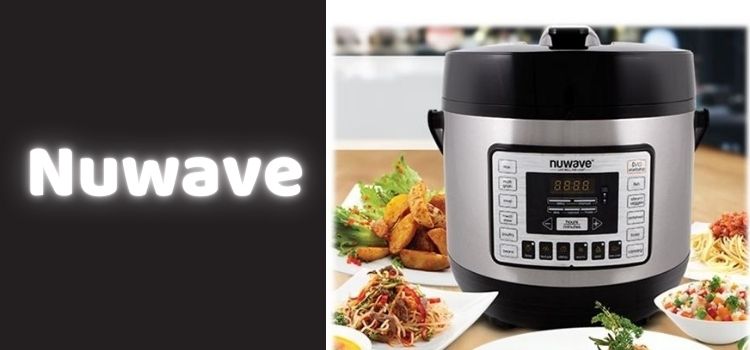
The NuWave Pressure Cooker is an electric pressure cooker that cooks food fast under pressure. It has a digital control panel with one-touch cooking presets, a safety locking lid, and a stainless-steel interior pot. By working in conjunction to form a closed-off environment where steam can be increased to an internal pressure and temperature to cook food faster than traditional methods, these components work together.
Advantages of Using a NuWave Pressure Cooker
Saves Time: MPF-MD cooks meals 70% quicker than traditional methods.
Nutrient Preservation: Helps to preserve vitamins and minerals as it takes less time to cook things.
Reduced Energy Consumption: Shortens your cooking time to use less energy.
Taste: Seals in flavour and moisture for succulent, flavour-filled food.
How To Use Your NuWave Pressure Cooker
1.Unboxing and Initial Setup
- Check the Parts: Make sure everything is included: the main unit, inner pot, lid, sealing ring, and accessories like the steaming rack and measuring cup.
- Clean: Wash the inner pot, lid and accessories with warm soapy water to clean before use. Use a damp cloth to wipe the outside.
- Put the Puzzle Together: Insert the inner pot into the main unit. Insert the sealing ring correctly inside the lid.
2.How the Control Panel Works
It has a digital control panel with preset functions for Rice, Soup, Meat/Stew etc. Get to know these presets and the manual settings to help you control cooking times and pressures according to your recipes.
How To Use NuWave Pressure Cooker: Step By Step Guide
1.Prepare Your Ingredients
- Chop And Measure: Chop vegies and meats into equal pieces, so that everything can cook evenly. ChefPrep™ liquid and seasoning measure
- Sauté (If Required): In recipes where you need to brown or sauté some ingredients, the Sear function lets you brown or sauté inside the inner pot (before you pressure cook).
2.Adding Ingredients to the Inner Pot
- Stacking: put heavier things like meats on the bottom and leafy vegetables on top
- Add Liquid: Always include enough liquid (generally a minimum of 1 cup) to create steam and pressure.
3.Secure the Lid
- Align and Lock: Put the lid on the cooker and line up the arrows, and then twist the lid clockwise to lock it.
- Set The Pressure Release Valve: Make sure the valve is closed to allow pressure to build (this is 99% of the time in the ‘Sealed’ position).
4.Select the Cooking Program
- Select one of the Presets or Manual Setting: Press the preset button for the one you want to use, or choose ‘Manual’ to adjust time and pressure settings to your desires.
- Time & Pressure: Adjust the cooking time by using the + and ‘–’ buttons. There were certain models that also came with adjustable pressure levels.
5.Initiate Cooking
- Start Cooking: Press the ‘Start/Stop’ button to start cooking. As the cooker is building the pressure, the progress will be reflected in the display.
- Watch the Cooker: The cooker is pretty safe to walk away from and leave it to do its job, but it’s reasonable to be around when using it the first time to make sure it all works properly.
6.After cooking the pressure you have to release it
- Natural release: Let the pressure drop naturally This technique works well for items such as meat and casseroles.
- Immediate Open: Rotate the pressure release valve to the ‘Vent’ position to instantly release steam. Use this for foods like vegetables (light).
7.Open the Lid Safely
- Let Go of All Pressure: Wait for the pressure indicator to fall before opening the lid.
- Open away from Face: Twist the lid counterclockwise and pull away from you to prevent steam burns.
Cleaning and Maintenance
- As Soon as You Finish Using it:
- Take out the inner pot and wash it with warm soapy water. Use a water damped cloth to clean the outer surface and in the cover.
- Ring:
- Check For Damaged Sealing If you see any cracks or have any sort of deformation, replace it.
- Steam Valve:
- Inspect it for food leftovers and wipe it off to avoid blocking
- Storage:
- The lid should be placed upside down on the unit to increase the lifetime of the sealing ring inside the unit.
Safety Tips
Do Not Overfill: It is advisable not to fill the inner pot above the appropriate levels else, there is a risk thy overflow the pot and the pressure is not being built up.
Add Enough Liquid: When working with the pressure cooker, make sure always to add at least the amount of liquid necessary to create steam and pressure.
Don’t Open It Forcefully: Never try to open the lid of cooker when it is under Pressure.
Periodic Inspection: Regularly inspect all parts, primarily the sealing ring and pressure release valve for any signs of wear or damage.
Troubleshooting Common Issues
No Under Pressure
Make sure the sealing ring is in properly, lid is closed and locked, and venting valve is set to ‘Sealed’
Steam Escaping from Lid
Inspect the sealing ring for any damage or improper placement. Also make sure the lid is properly lined up and locked.
Food not cooking/prepared uniformly
Ingredients cut too differently in dimensions – or pot is packed full of ingredients. Also, other than stirring ingredients before sealing can also help achives evn cook as well.
Exploring Advanced Features
With extra functionalities powering it, here are a few things that the NuWave Pressure Cooker lets you do:
- Delay Start: Enable this to program the cooker to start cooking at
Conclusion
While there are plenty of different kitchen appliances that can make your time cooking a lot easier, the NuWave Pressure Cooker has got to be one of the best multi-functional ones that you can invest in that can really take your cooking to the next level! Armed with the information contained in this guide, you can utilize its features to help you prepare a myriad of meals in no time. If you follow the safety tips and keep it well-maintained, you can expect your pressure cooker to serve you well for years with a consistent flow of delicious, fast and nutritious meals.
FAQs
How to use the NuWave pressure cooker on a stove?
Place ingredients and liquid into the NuWave stovetop pressure cooker, secure the lid, set the pressure valve to ‘Sealed,’ and heat on medium-high. Once pressure is reached, adjust heat to maintain it, cook as directed, then release pressure safely.
How to use NuWave pressure cooker recipes?
Select recipes designed for the NuWave pressure cooker, follow ingredient quantities, utilize preset functions as specified, and adhere to safety guidelines. For tailored recipes, visit NuWave’s official website.
How to use nuwave pressure cooker youtube ?
As an Amazon Associate, I earn from qualifying purchases
Pingback: Aluminium vs Stainless Steel Pressure Cooker: Which is Better ?